I definitely agree that these parts are a mix of incompletes and errors. From what I gather, most of the good stuff was put together into assembled guitars a few years ago, and what's left is piecemeal. Judging from what I got, there's still good guitars to be had if you're willing to put some work into it.
The string barrel looks smaller than it is because there's no binding on the neck. My '66 is 1 9/16" at the zero fret, and this neck is 1 10/16". It's a bigger difference down the neck, at the 19th fret my '66 is 2 1/16", and this one is 2 4/16".
I may take a shot at reshaping the neck, but I'm going to get the guitar put together and play it some first. Also, since I've never done neck shaping before, I'll practice on some spare wood before starting!
I bit off more than I expected with this project, but I think it will turn out alright. I'm learning a lot and I haven't ruined it (yet) Hopefully I'll be making music with it before too long!
Mel
Semi - Mosrite?
-
MWaldorf

- Site Admin
- Posts: 3264
- Joined: Sat May 24, 2008 1:21 pm
- Location: Alameda, California
- Contact:
Re: Semi - Mosrite?
Oy vey - it's MESHUGGA BEACH PARTY - The world's premier Jewish Surf Music Band!

What? Couldn't tell the logo is a link? So click here, what's the hold up? http://www.meshuggabeachparty.com
What? Couldn't tell the logo is a link? So click here, what's the hold up? http://www.meshuggabeachparty.com
-
dubtrub

- Administrator
- Posts: 3852
- Joined: Sun May 04, 2008 10:12 am
Re: Semi - Mosrite?
I have no doubt you will get'er finished and playing real soon. Here's a video of one of those guitars with the neck left unshaped and it seems to work just fine. Actually there's another video after this one play's.  video
video
Danny Ellison
-
MWaldorf
- Site Admin
- Posts: 3264
- Joined: Sat May 24, 2008 1:21 pm
- Location: Alameda, California
- Contact:
Re: Semi - Mosrite?
Wow, the neck on that one is even less finished than mine. It looks like the heel starts at the 15th fret. Mine is closer to the 18th fret. Crazy crunchy rawk tone he gets with both Mosrites!
Oy vey - it's MESHUGGA BEACH PARTY - The world's premier Jewish Surf Music Band!
What? Couldn't tell the logo is a link? So click here, what's the hold up? http://www.meshuggabeachparty.com
What? Couldn't tell the logo is a link? So click here, what's the hold up? http://www.meshuggabeachparty.com
-
Dennisthe Menace

- Moderator
- Posts: 4981
- Joined: Mon May 05, 2008 8:40 pm
- Location: Ft Lauderdale Florida
Re: Semi - Mosrite?
Mel wrote:
Hey, when these P'ups (single coil or humbucker) are EQ'd right,
not only will they get nasty sounding (in a good way),
they will threaten you!
......"it's not just for SURF anymore"......
Crazy crunchy rawk tone he gets with both Mosrites!
Hey, when these P'ups (single coil or humbucker) are EQ'd right,
not only will they get nasty sounding (in a good way),
they will threaten you!
......"it's not just for SURF anymore"......
make the Mos' of it, choose the 'rite stuff.
.........Owner of 9 Mosrites...
.....proud owner and documented:
1963 "the Ventures" Model s/n #0038
http://www.thevintagerockproject.com/
.........Owner of 9 Mosrites...
.....proud owner and documented:
1963 "the Ventures" Model s/n #0038
http://www.thevintagerockproject.com/
-
MWaldorf
- Site Admin
- Posts: 3264
- Joined: Sat May 24, 2008 1:21 pm
- Location: Alameda, California
- Contact:
Re: Semi - Mosrite?
OK, day two of assembly brings progress, and compromise.
First I cut down the dowels from Thursday nice and flush.
Then I figure, since I'll be cutting the neck, I'll have to cut the truss rod end sleeve. Get the demel and cut away.
Here's the neck after I've hacksawed, chiseled and sanded. Looks pretty good. At this point I go to screw the nut on the end of the truss rod, and guess what? The nut makes a few turns and jams. Maybe I damaged the threads while shortening the neck, maybe it was already like this, either way I didn't check how far the screw would go before I cut the neck. Since I'm not keen on forcing the screw and breaking the truss rod, I come to the conclusion that I'll have to work around this.
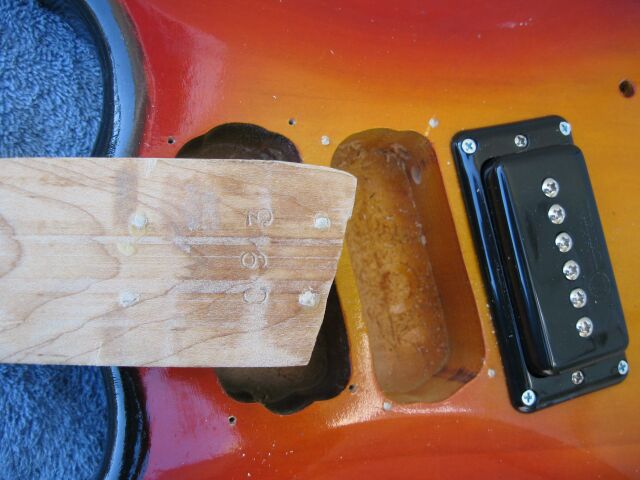
Here's what I've got to work around.
And here's the solution. I used my dremel to carefully cut a notch in the neck pickup ring to clear the truss rod nut. Thankfully the rings are solid plastic so there's still plenty of strength left there. It's ugly, but it works.
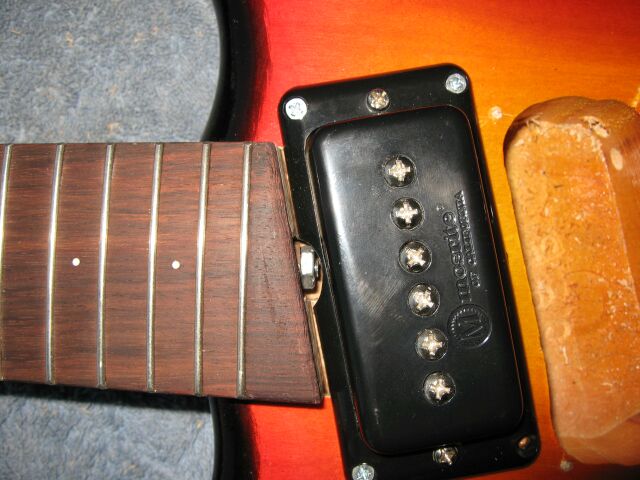
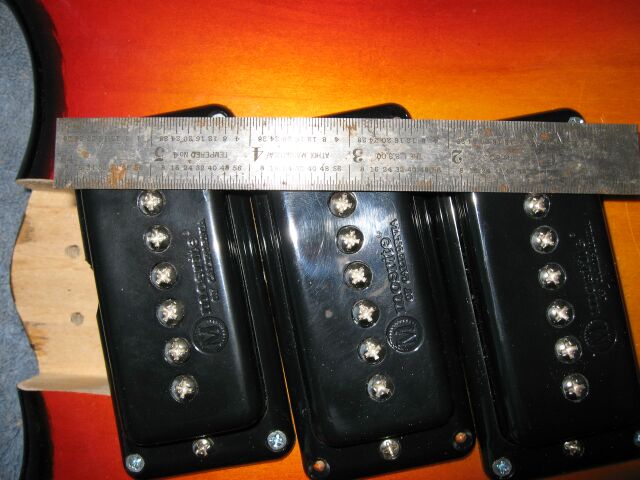
Next I used a ruler to align the middle pickup before re-screwing it in.
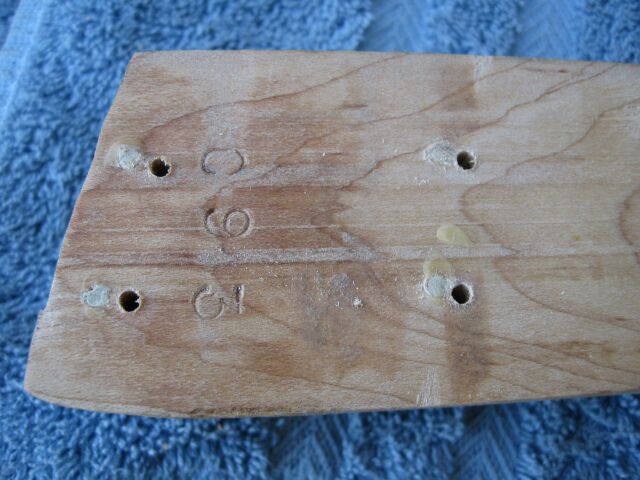
With the pickups in place I redrilled the neck holes, and here they are. You can see the old holes for reference of how much I was able to move the neck.
Neck is attached!
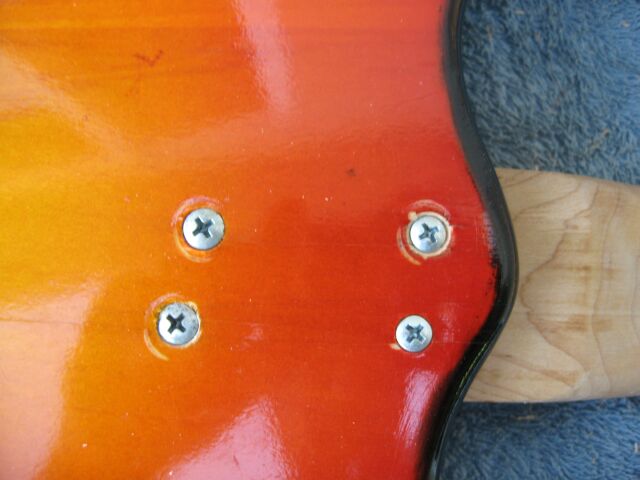
Neck attached, from front. You can see the nut, but from a distance it's not too offensive.
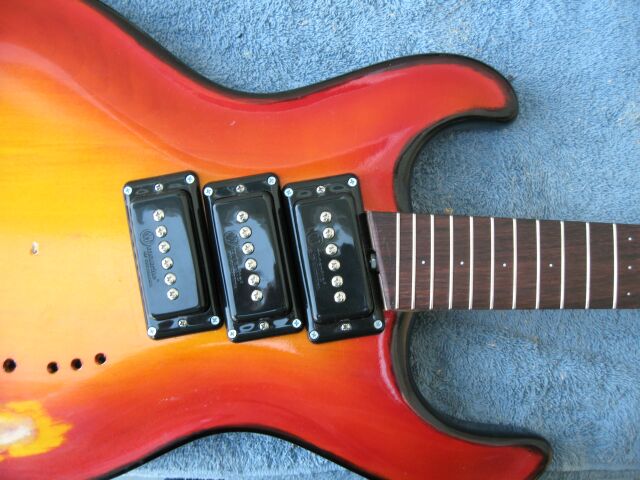
Next up, use the neck and pickups to align the bridge making sure there's clearance for the scale length.
Finally, bridge plate attached, a little mock up for inspiration.
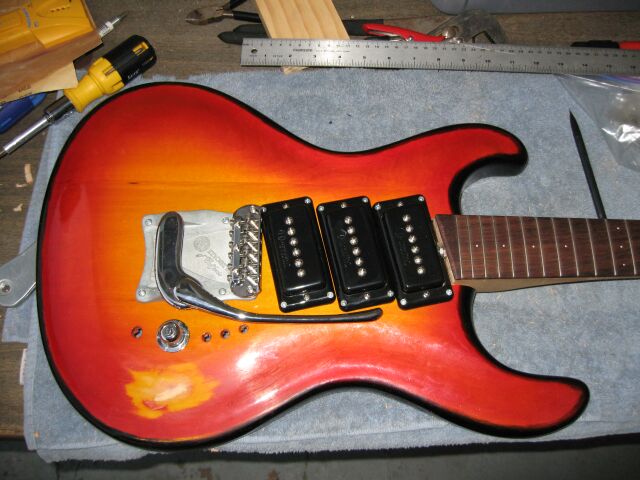
So, it's not going to look totally factory, more "hack-tory" which is disappointing, but it is what it is. Next up I'll be attaching the tuners and the tremolo, then wire it, string it up and have a listen.
First I cut down the dowels from Thursday nice and flush.
Then I figure, since I'll be cutting the neck, I'll have to cut the truss rod end sleeve. Get the demel and cut away.
Here's the neck after I've hacksawed, chiseled and sanded. Looks pretty good. At this point I go to screw the nut on the end of the truss rod, and guess what? The nut makes a few turns and jams. Maybe I damaged the threads while shortening the neck, maybe it was already like this, either way I didn't check how far the screw would go before I cut the neck. Since I'm not keen on forcing the screw and breaking the truss rod, I come to the conclusion that I'll have to work around this.
Here's what I've got to work around.
And here's the solution. I used my dremel to carefully cut a notch in the neck pickup ring to clear the truss rod nut. Thankfully the rings are solid plastic so there's still plenty of strength left there. It's ugly, but it works.
Next I used a ruler to align the middle pickup before re-screwing it in.
With the pickups in place I redrilled the neck holes, and here they are. You can see the old holes for reference of how much I was able to move the neck.
Neck is attached!
Neck attached, from front. You can see the nut, but from a distance it's not too offensive.
Next up, use the neck and pickups to align the bridge making sure there's clearance for the scale length.
Finally, bridge plate attached, a little mock up for inspiration.
So, it's not going to look totally factory, more "hack-tory" which is disappointing, but it is what it is. Next up I'll be attaching the tuners and the tremolo, then wire it, string it up and have a listen.
Oy vey - it's MESHUGGA BEACH PARTY - The world's premier Jewish Surf Music Band!
What? Couldn't tell the logo is a link? So click here, what's the hold up? http://www.meshuggabeachparty.com
What? Couldn't tell the logo is a link? So click here, what's the hold up? http://www.meshuggabeachparty.com
-
dubtrub
- Administrator
- Posts: 3852
- Joined: Sun May 04, 2008 10:12 am
Re: Semi - Mosrite?
Looking good, Mel. You'll be a happy camper when it's done knowing you brought those parts to life.
Regarding the truss rod. It's not like a Fender. You should be able to grab it with some pliers and pull it out of the neck. It suppose to slide in and out of the channel so that it is replaceable. You'll have to back off the tension to pull it out. That way you can re cut the threads and shorten it if need be.
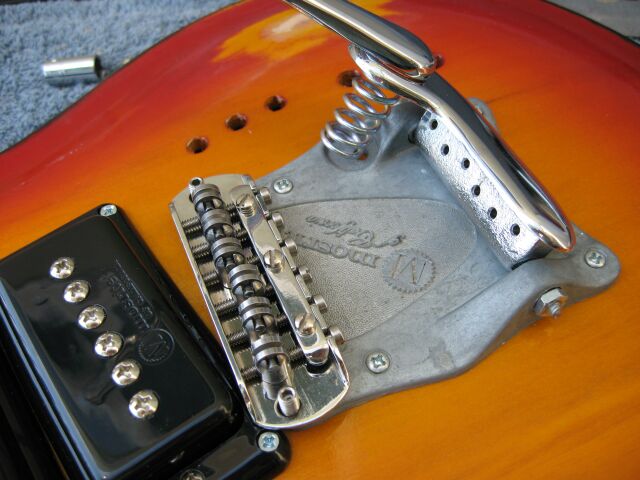
Also, is that vibrato plate brass or aluminum? If it is aluminum, all you do is smooth it up with some files and emery cloth/paper, then polish it out. Of course if it's brass you'll have to have it chrome plated.
Regarding the truss rod. It's not like a Fender. You should be able to grab it with some pliers and pull it out of the neck. It suppose to slide in and out of the channel so that it is replaceable. You'll have to back off the tension to pull it out. That way you can re cut the threads and shorten it if need be.
Also, is that vibrato plate brass or aluminum? If it is aluminum, all you do is smooth it up with some files and emery cloth/paper, then polish it out. Of course if it's brass you'll have to have it chrome plated.
Danny Ellison
-
MWaldorf
- Site Admin
- Posts: 3264
- Joined: Sat May 24, 2008 1:21 pm
- Location: Alameda, California
- Contact:
Re: Semi - Mosrite?
Assembly - Day 3
Following Danny's sage advice, I have a tug on the truss rod, and voila, out it comes. Why I didn't think to try this yesterday before hacking up a perfectly good pickup ring is beyond me. I am putzhead, hear me roar.
So, today I managed some progress but hit a roadblock at the end of the day. Here in pictures:
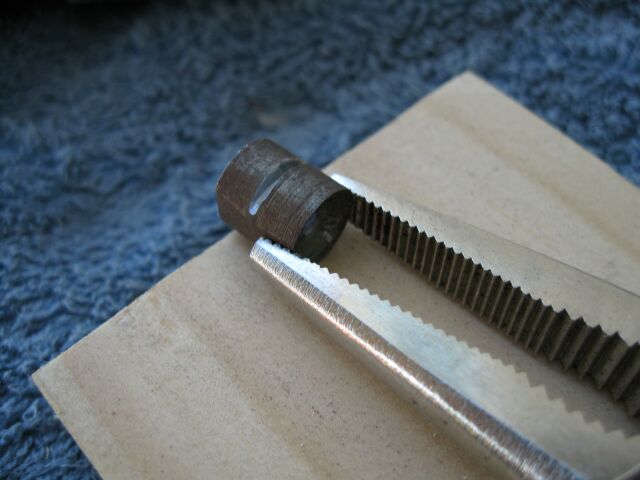
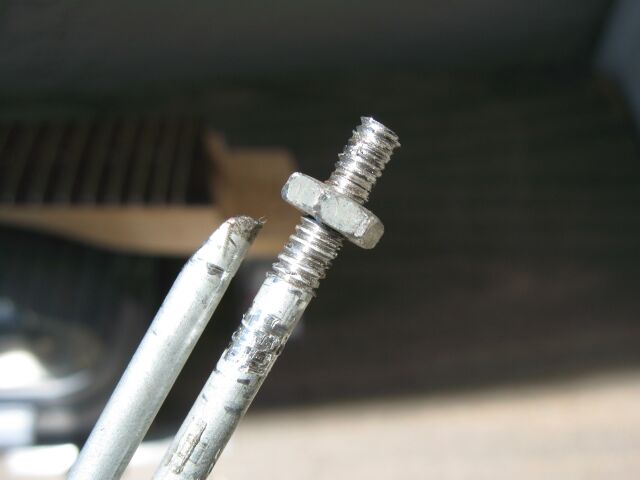
First, for anyone like me who didn't know, this is a Mosrite-style truss rod
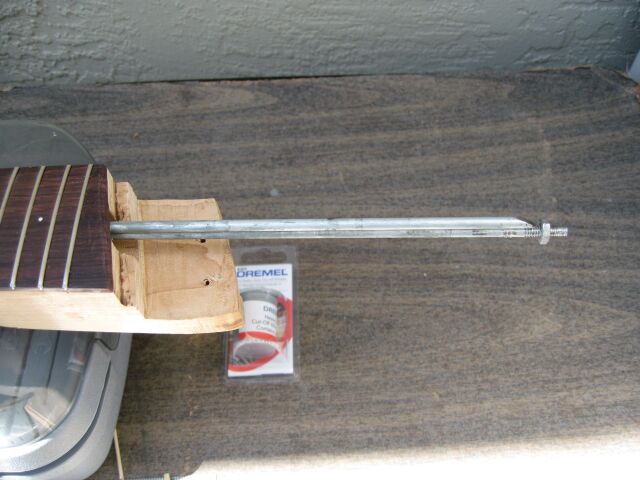
Here, showing how much I have to cut off. Much easier when it's not in the neck!
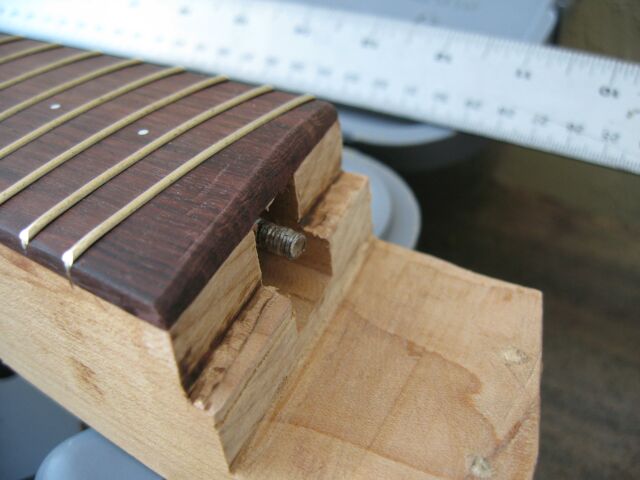
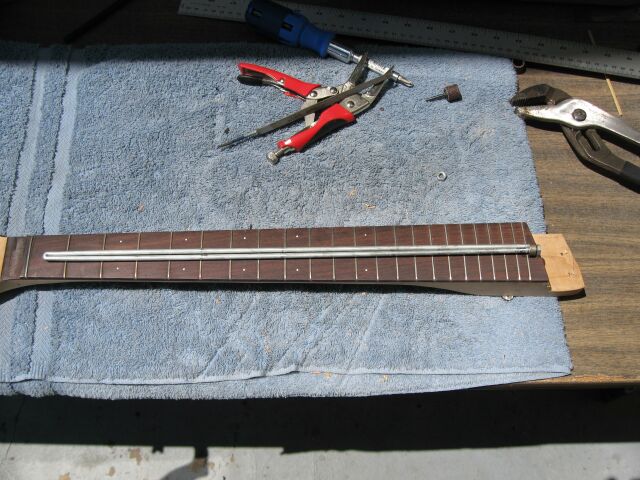
For reference, the truss rod in roughly it's position inside the neck
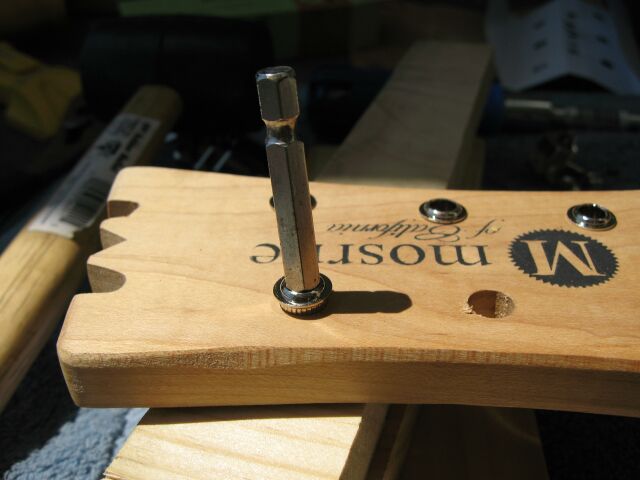
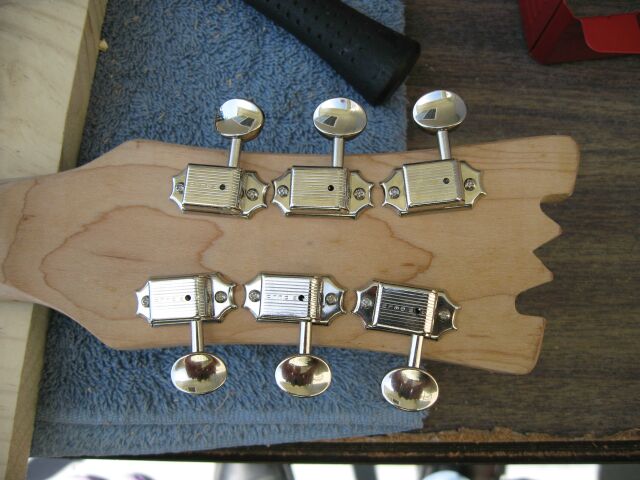
Next up, installing the tuning pegs. I got Kluson reissue safety-posts. First I lined them up and marked where to drill the screw holes
Then I thought, maybe I should get the bushings in before I start drilling in case it changes the alignment. I used a rubber mallet and an appropriately sized socket head to drive the bushings in. The block of wood underneath the headstock is there to get it level and support it so I don't snap it off with an errant mallet stroke. As it turned out, the initial alignment for the drill holes was fine.
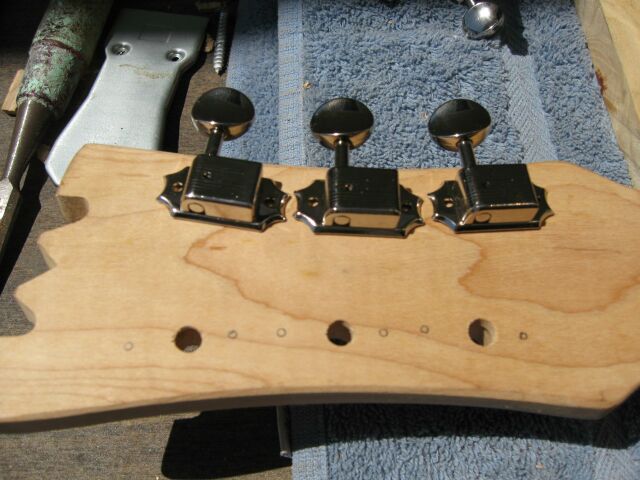
Here are the tuners from the rear
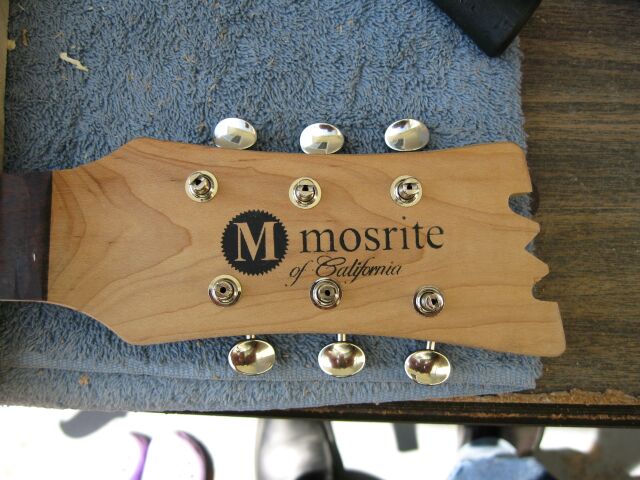
And here from the front. I eyeballed it to get the tuners at a right angle to the headstock curve and I think I did alright.
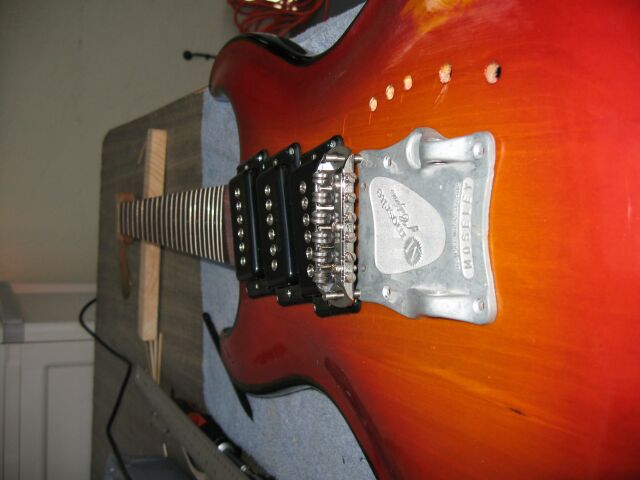
Next I installed the bridge. Since I wanted to get this stringed up before I spend time polishing up the trem base plate (I'm pretty sure it's aluminum; it's certainly not brass) I used a length of threaded rod to hold the string guide. Of course, once it was strung I see that I have the bridge about an 1/8" too far to the treble side. Off I go, fill the old holes and redrill. This thing is going to be swiss cheese by the time I'm done.
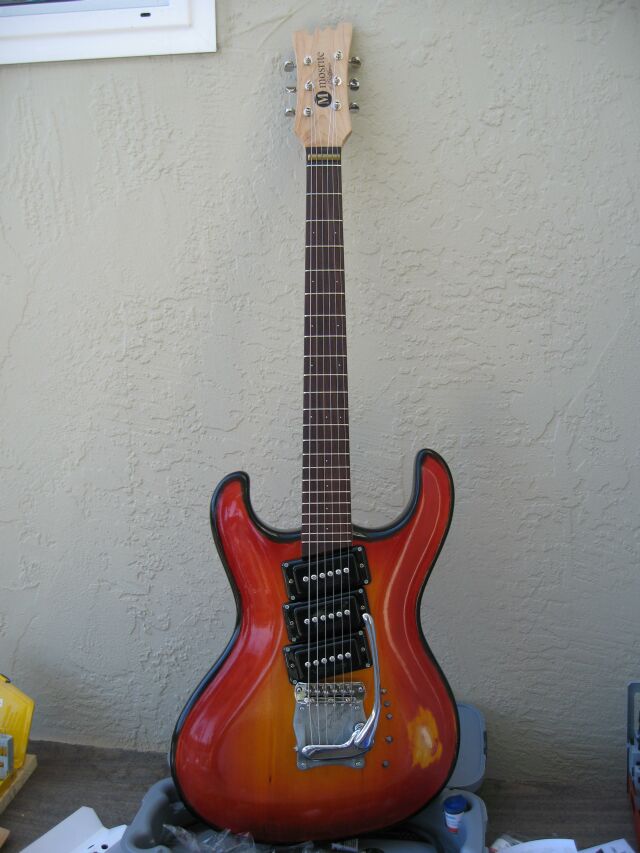
So, here it is in it's current glory. A few observations - this neck is WIDE. It's about 2 1/4" at the neck joint. My '66 is 2 1/16" and my Fender Jaguar is 2 1/8". It leaves a good hunk of neck outside the narrow bridge string spacing. I think it will be alright to play, just different than my '66. The neck is chunky too, but that at least I can rectify by reshaping. Judging from pictures of other 80s/90s Mosrites, I think this neck isn't unusual in width, but most of the other necks I've seen pictures of have binding so it's hard to tell exactly. Given the angled pickups, a bridge any wider than the stock Mosrite one would have the strings off the polepieces, so I'm guessing that any Mosrites with necks over 2 1/16" wide have a big space on the sides. At least I won't have my strings roll off the neck on heavy bends!
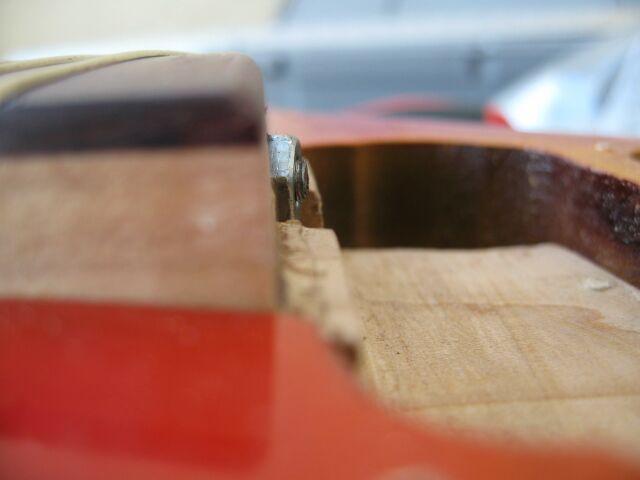
And here I get to my roadblock - I go to tune it up, and the zero fret is lower than the first fret. RRRRRR!!!!!! Fret work is definitely beyond the scope of my skills. If I can find my capo, I'll tune it up on the first fret, get the truss rod adjusted and wire the thing up to see how it sounds. At that point, I'll take the neck to a professional and while that's being fixed up I'll polish up the trem plate. Ah, patience, grasshopper. Patience.
Following Danny's sage advice, I have a tug on the truss rod, and voila, out it comes. Why I didn't think to try this yesterday before hacking up a perfectly good pickup ring is beyond me. I am putzhead, hear me roar.
So, today I managed some progress but hit a roadblock at the end of the day. Here in pictures:
First, for anyone like me who didn't know, this is a Mosrite-style truss rod
Here, showing how much I have to cut off. Much easier when it's not in the neck!
For reference, the truss rod in roughly it's position inside the neck
Next up, installing the tuning pegs. I got Kluson reissue safety-posts. First I lined them up and marked where to drill the screw holes
Then I thought, maybe I should get the bushings in before I start drilling in case it changes the alignment. I used a rubber mallet and an appropriately sized socket head to drive the bushings in. The block of wood underneath the headstock is there to get it level and support it so I don't snap it off with an errant mallet stroke. As it turned out, the initial alignment for the drill holes was fine.
Here are the tuners from the rear
And here from the front. I eyeballed it to get the tuners at a right angle to the headstock curve and I think I did alright.
Next I installed the bridge. Since I wanted to get this stringed up before I spend time polishing up the trem base plate (I'm pretty sure it's aluminum; it's certainly not brass) I used a length of threaded rod to hold the string guide. Of course, once it was strung I see that I have the bridge about an 1/8" too far to the treble side. Off I go, fill the old holes and redrill. This thing is going to be swiss cheese by the time I'm done.
So, here it is in it's current glory. A few observations - this neck is WIDE. It's about 2 1/4" at the neck joint. My '66 is 2 1/16" and my Fender Jaguar is 2 1/8". It leaves a good hunk of neck outside the narrow bridge string spacing. I think it will be alright to play, just different than my '66. The neck is chunky too, but that at least I can rectify by reshaping. Judging from pictures of other 80s/90s Mosrites, I think this neck isn't unusual in width, but most of the other necks I've seen pictures of have binding so it's hard to tell exactly. Given the angled pickups, a bridge any wider than the stock Mosrite one would have the strings off the polepieces, so I'm guessing that any Mosrites with necks over 2 1/16" wide have a big space on the sides. At least I won't have my strings roll off the neck on heavy bends!
And here I get to my roadblock - I go to tune it up, and the zero fret is lower than the first fret. RRRRRR!!!!!! Fret work is definitely beyond the scope of my skills. If I can find my capo, I'll tune it up on the first fret, get the truss rod adjusted and wire the thing up to see how it sounds. At that point, I'll take the neck to a professional and while that's being fixed up I'll polish up the trem plate. Ah, patience, grasshopper. Patience.
Oy vey - it's MESHUGGA BEACH PARTY - The world's premier Jewish Surf Music Band!
What? Couldn't tell the logo is a link? So click here, what's the hold up? http://www.meshuggabeachparty.com
What? Couldn't tell the logo is a link? So click here, what's the hold up? http://www.meshuggabeachparty.com
-
dubtrub
- Administrator
- Posts: 3852
- Joined: Sun May 04, 2008 10:12 am
Re: Semi - Mosrite?
Hurrah! It has become a guitar. Isn't guitar building fun! 
Just think, from now on every time you pickup a guitar, you will scrutinize it to the fullest because now you can appreciate what goes into building one. As for the string guide, go to you nearest hobby shop and buy a sheet of brass. It comes in various thicknesses about 2"X8" sheets. Cut out a shim the circumference of the string guide and use some contact glue and glue it to the bottom of the string guide, then when you are ready contact glue it to the neck. Once it's polished it won't be noticable. Meantime you can use business card shims to determine the thickness of brass you will need. Also, you can probably get a replacement pickup ring from Ed.
One other thing. If you can't get the string low enough with the bridge due to the pickup ring stopping it, you can always put a shim under the neck just like you would on a Fender guitar.
Danny Ellison
-
Dennisthe Menace
- Moderator
- Posts: 4981
- Joined: Mon May 05, 2008 8:40 pm
- Location: Ft Lauderdale Florida
Re: Semi - Mosrite?
I Sense a DANGEROUS GUITAR on the HORIZON!!
Mel, that came out Sweet!!
make the Mos' of it, choose the 'rite stuff.
.........Owner of 9 Mosrites...
.....proud owner and documented:
1963 "the Ventures" Model s/n #0038
http://www.thevintagerockproject.com/
.........Owner of 9 Mosrites...
.....proud owner and documented:
1963 "the Ventures" Model s/n #0038
http://www.thevintagerockproject.com/
-
KRamone27

- Master Contributor
- Posts: 1325
- Joined: Mon May 05, 2008 1:38 pm
- Location: Carterville, IL
- Contact:
Re: Semi - Mosrite?
MWaldorf wrote:Here, showing how much I have to cut off. Much easier when it's not in the neck!
For reference, the truss rod in roughly it's position inside the neck
I have never seen a truss rod built like that before. it looks basically like a dual action truss rod. Mel did you happen to make measurements of the truss rod? Kevin
Return to “Mosrite & Clone, Projects, Parts & Accessories Q&A”
Who is online
Users browsing this forum: No registered users and 170 guests