Semi - Mosrite?

User avatar
dubtrub
Administrator
Posts: 3795
Joined: Sun May 04, 2008 10:12 am
Contact:

Re: Semi - Mosrite?

Postby dubtrub » Mon Aug 04, 2008 8:39 pm

Mel,

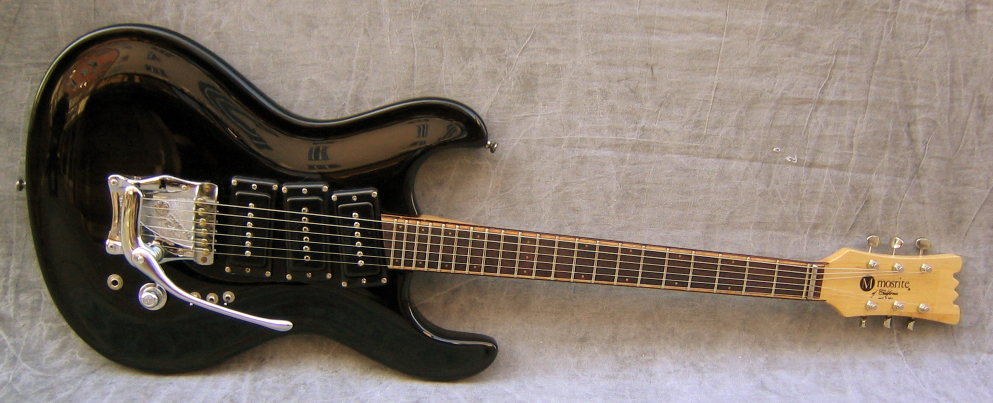
Looking at this photo, cutting the fretboard was apparently required on the three pickup version. Plus it is obvious why the rear pickup was mounted parallel with the bridge. So your method to squeeze in those three pickup was first done by Semie and should be considered authentic. :lol:

Image
Danny Ellison

User avatar
MWaldorf
Site Admin
Posts: 3264
Joined: Sat May 24, 2008 1:21 pm
Location: Alameda, California
Contact:

Re: Semi - Mosrite?

Postby MWaldorf » Mon Aug 04, 2008 9:00 pm

Danny,
Ha! You're right, I'm not the first who got hit with that math. Also, with all that binding, I think the neck on that black guitar may be as wide as the neck on mine.
Mel
Oy vey - it's MESHUGGA BEACH PARTY - The world's premier Jewish Surf Music Band!

Image

What? Couldn't tell the logo is a link? So click here, what's the hold up? http://www.meshuggabeachparty.com

User avatar
MWaldorf
Site Admin
Posts: 3264
Joined: Sat May 24, 2008 1:21 pm
Location: Alameda, California
Contact:

Re: Semi - Mosrite?

Postby MWaldorf » Mon Aug 04, 2008 11:02 pm

Inspiration and daughter's early bed time collaborate to give: progress!

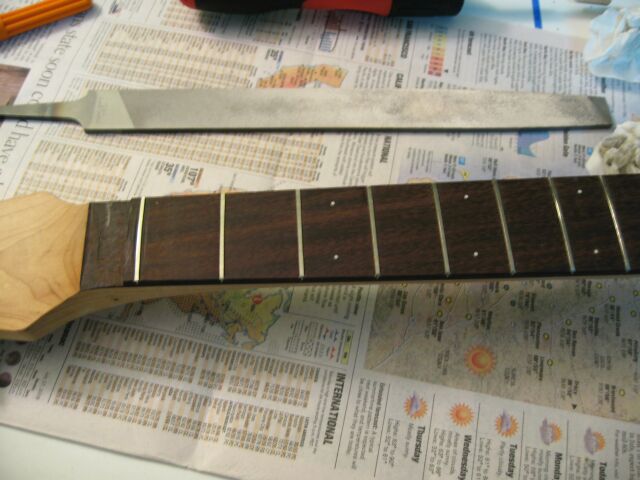
Figuring that I'll have to take the neck to a luthier, I thought why not try to take care of the frets myself? The worst is I'll have to take it to a luthier, right?

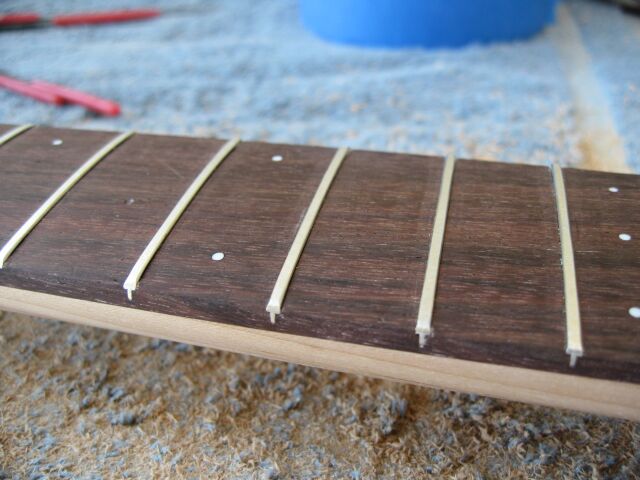
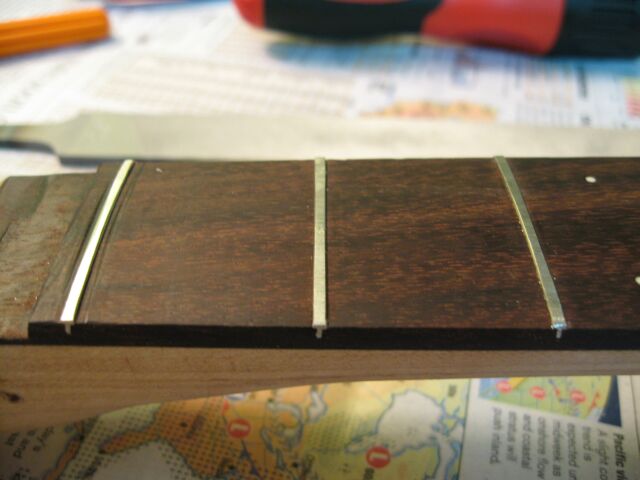
So, out comes the file and away I go. I filed the frets pretty low, not as low as my '66 but I managed to get them pretty even.
Image

Oooh, starting to look like speed frets!
Image

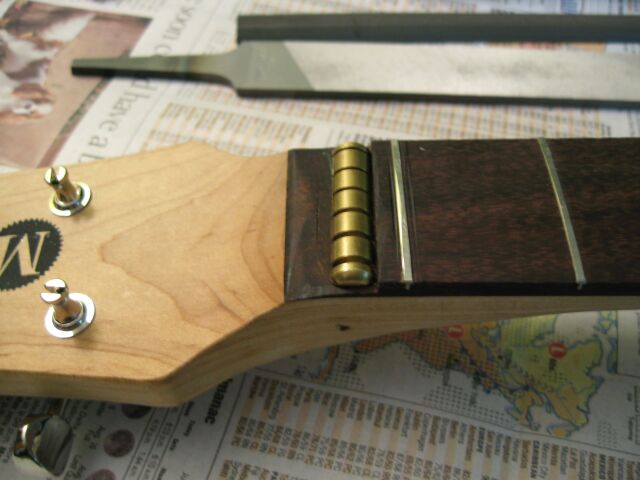
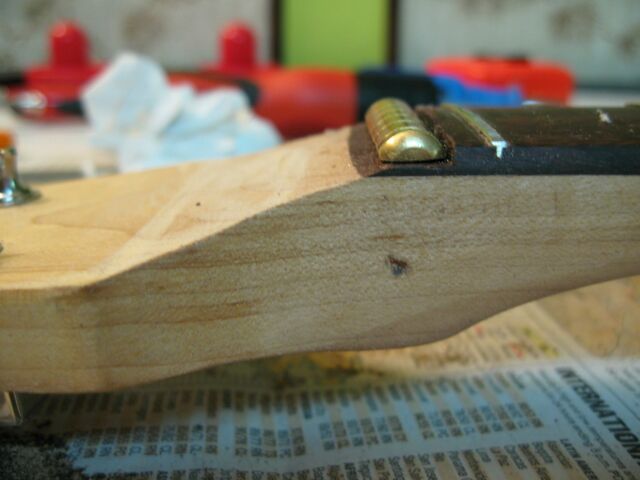
Encouraged by the fret work success, I decided to take on the "turtleneck" - that rosewood overshot past the string guide. It isn't in the way of the strings, but I don't like the way it looks.
Image

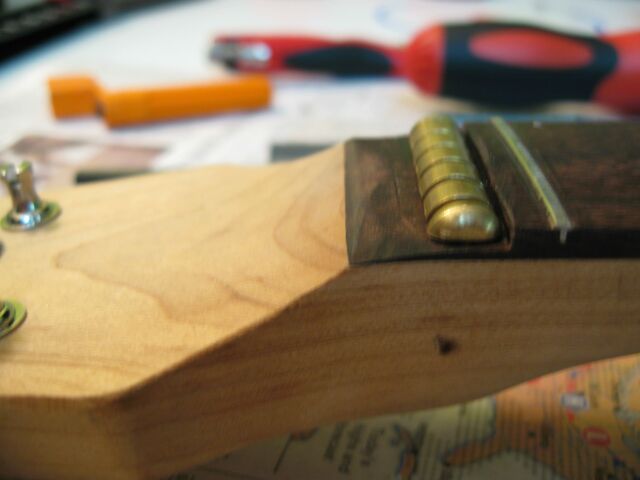
From the side, it's even more egregious. So, out comes the rasp and files and grind grind grind away.
Image

Hey, looks better to me! I'd like to get some curve in there, but at least it's nice and smooth.
Image

So, two steps forward. I tuned up the guitar for the first time and all the frets sound without buzzing. The tremolo action is smooth too, though I think I'm going to have to get a heavier gauge spring. The neck is a real baseball bat and given my little trial on the headstock, I think I'm going to try and shape it down to a more Mosrite-y profile. I'll also crown the frets a bit, but I think I may try and get them closer to my '66 speed frets first.

Somewhere in there I'm also going to wire this baby up and see how it sounds!
Oy vey - it's MESHUGGA BEACH PARTY - The world's premier Jewish Surf Music Band!

Image

What? Couldn't tell the logo is a link? So click here, what's the hold up? http://www.meshuggabeachparty.com

User avatar
MWaldorf
Site Admin
Posts: 3264
Joined: Sat May 24, 2008 1:21 pm
Location: Alameda, California
Contact:

Re: Semi - Mosrite?

Postby MWaldorf » Mon Aug 04, 2008 11:27 pm

Hey Kevin - I forgot to mention that I measured up the truss rod tonight. It's a piece of 3/8" steel bent in half. The short leg (with the angle filed on the end) is 17" long, and the threaded end is 17.5" long after I cut it. Figure it was 18" long initially.
Oy vey - it's MESHUGGA BEACH PARTY - The world's premier Jewish Surf Music Band!

Image

What? Couldn't tell the logo is a link? So click here, what's the hold up? http://www.meshuggabeachparty.com

User avatar
dubtrub
Administrator
Posts: 3795
Joined: Sun May 04, 2008 10:12 am
Contact:

Re: Semi - Mosrite?

Postby dubtrub » Mon Aug 04, 2008 11:37 pm

"3/8" steel bent in half" :shock:

How about 3/16". ;)

Mel, I am impressed and proud of you for tackling such a project. That was actually more of an advanced project than a first time one. That is coming along great.

Just get yourself an old fashion 1/2 round wood rasp and dress the neck down. Continue shaping and comparing it to the shape and feel of your '66.

You should be able to 'guesstimate' the amount of wood between the bottom of the trussrod channel and how much you can remove. You can also use the rasp to shape the contour at the string guide. Get one of those rasp that is flat on one side and semi round on the other. Half of it will be for rough cut and the other will be a little smoother. Lowes, Ace Hadware, Home Depot will have it.
Danny Ellison

User avatar
Bushers
Valued Member
Posts: 192
Joined: Wed Jul 16, 2008 7:34 pm
Location: Tulsa, OK (UK (Southampton) Expat)
Contact:

Re: Semi - Mosrite?

Postby Bushers » Tue Aug 05, 2008 6:00 am

Some nice work you're doing here Mel! Are you going to make a second cut, 90deg to the first on the string nut so that it sits up to the neck? I was looking at my model and the nut does have this 2nd cut, at least on my model, not sure what your model would have looked like though, just an observation! :D
Jason (Bushers)
1965 Ventures II Model ~ #B233

User avatar
MWaldorf
Site Admin
Posts: 3264
Joined: Sat May 24, 2008 1:21 pm
Location: Alameda, California
Contact:

Re: Semi - Mosrite?

Postby MWaldorf » Tue Aug 05, 2008 10:58 am

Danny,
Yeah, 3/16 is what I meant - as I said I'm sometimes a bit weak on details! I'll try the rasp and see how that goes.

Jason,
Good point on the 90 degree cut - my '66 has it, and I might as well do it here too. I hadn't yet because there was so much space to fill, but now that I'm shaping that contour I might as well do it right.

This project has definitely pushed the envelope for me, but so far successfully!
Mel
Oy vey - it's MESHUGGA BEACH PARTY - The world's premier Jewish Surf Music Band!

Image

What? Couldn't tell the logo is a link? So click here, what's the hold up? http://www.meshuggabeachparty.com

User avatar
MWaldorf
Site Admin
Posts: 3264
Joined: Sat May 24, 2008 1:21 pm
Location: Alameda, California
Contact:

Re: Semi - Mosrite?

Postby MWaldorf » Mon Aug 11, 2008 1:24 pm

Progress - the V3 is alive! Thanks to great understanding on the part of my wife and daughter I was able to put a full day and a half into the Mosrite project, and as a result it's a live guitar!

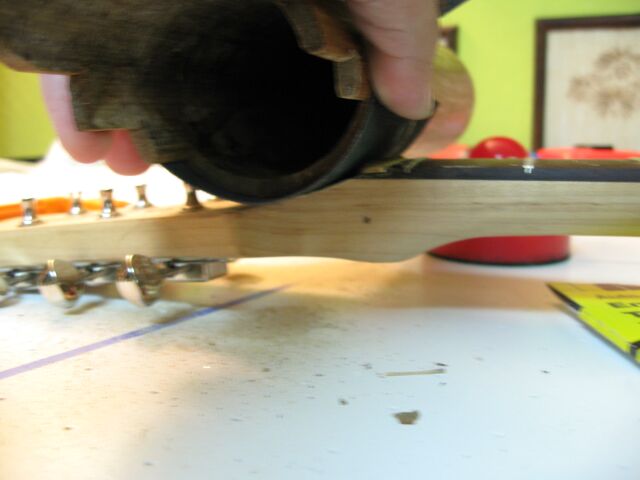
Friday night, neck shaping - I started where I left off with the front of the headstock. Here I used advanced technology (sandpaper wrapped around a bamboo vase) to shape the curve.
Image

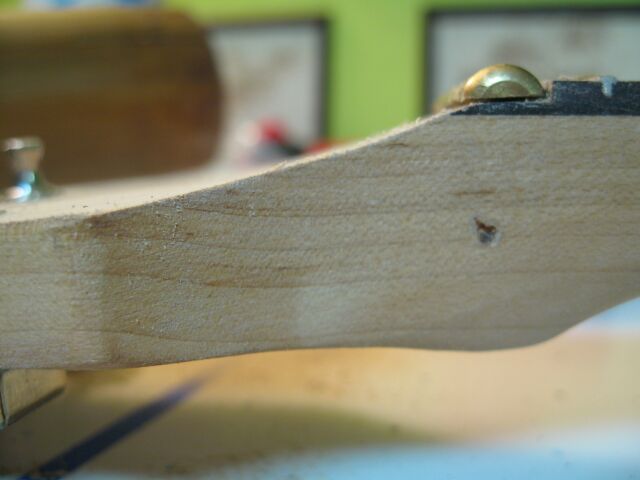
Here's the final, pretty smooth and close to the real deal.
Image

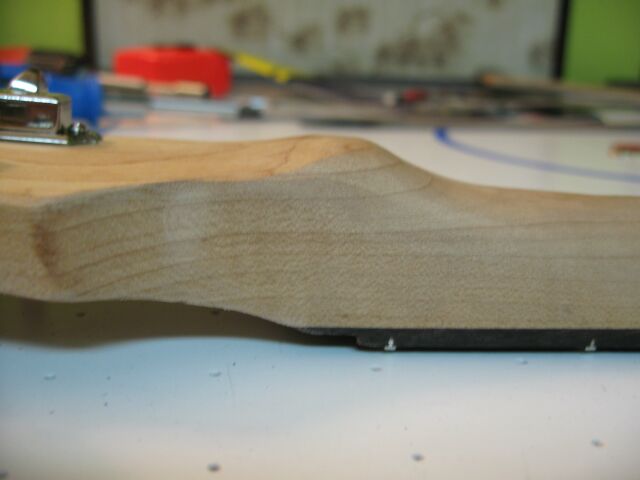
Next up, the back of the volute. Here's how I got it, an amorphous blob.
Image

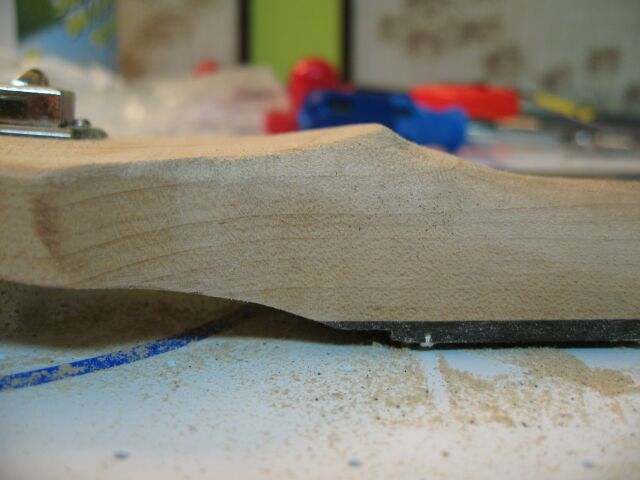
Using a rasp, round-back files and the above mentioned bamboo sanding block, I shaped the volute, again using my '66 as a visual guide. Here's the result in progress, with the headstock side done but still needing work on the neck side.
Image

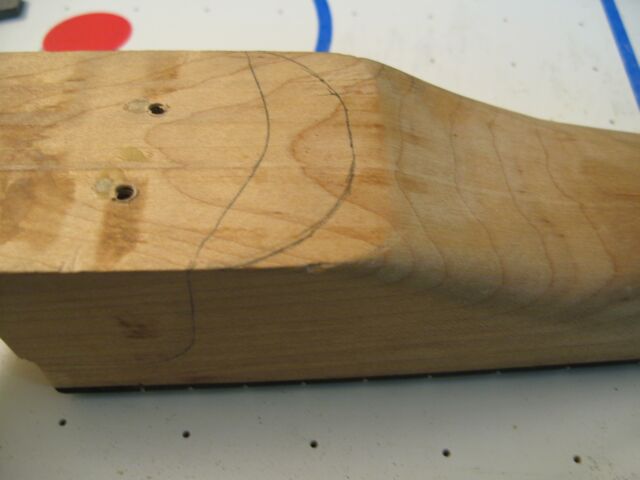
Finally for Friday, I penciled in the line where the heel of the neck meets the body and then roughed in the desired shape of the heel, based on my '66.
Image

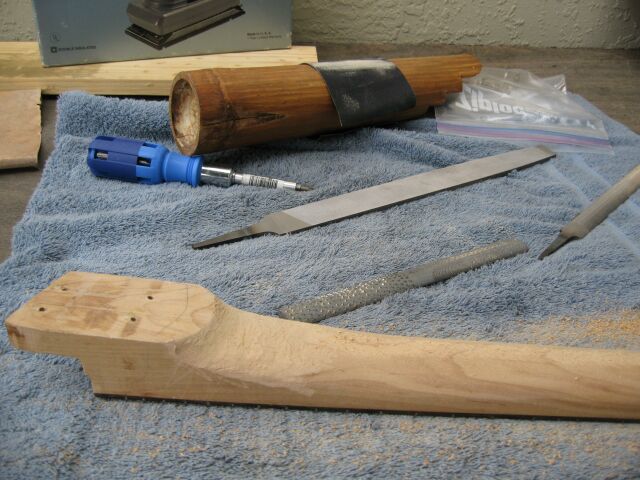
Saturday morning I started in on the heel. Here's the work in progress, with the tools of the trade in the background. I also used my dremel with a sanding wheel.
Image

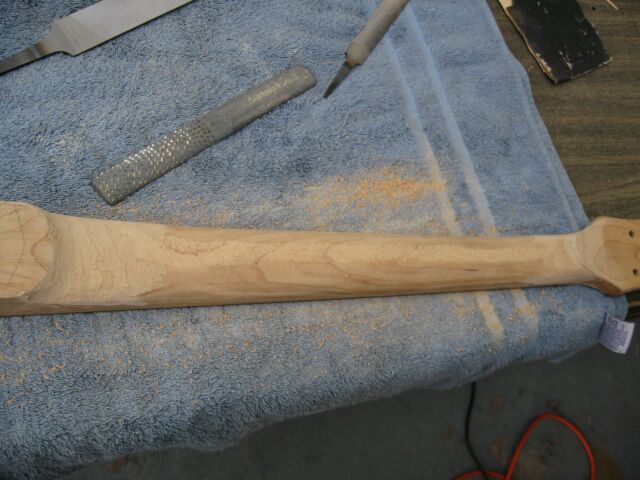
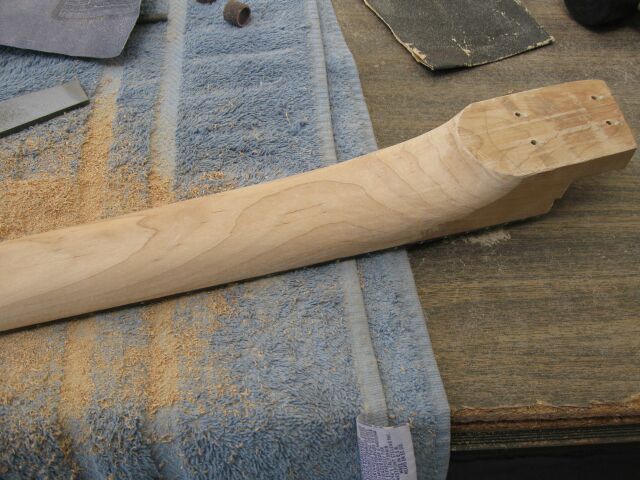
Once I got the heel and volute in rough form, I started on the neck profile. Here, I first filed the back of the neck down to the thickness I wanted, and then shaped the curve of the neck from there.
Image

Hours and hours later - a neck profile! While I didn't use calipers, I kept referring to my '66 for visual cues on thickness, shape around the volute and heel and also for general feel. This neck is wider than the '66 and the profile I wound up with is more of a "U" than a "C" but it feels nice to my hands. I started with the rasp, then files, then dremel, then a power sander. After than I moved to progressively finer sandpaper, starting around 180 and moving to 600. This picture was taken before I did the sandpaper.
Image

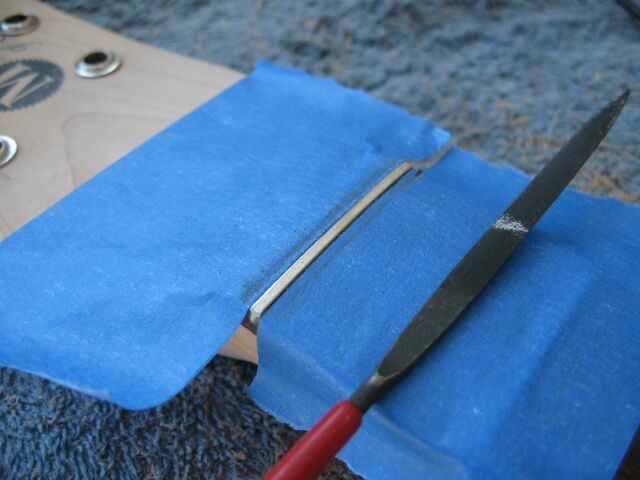
Next, fret dressing. I used painters' masking tape to protect the fretboard and a small file to round over the edges and ends of the frets. Utterly inexact, I did a couple of passes on each fret.
Image

Speed frets!!!!
Image

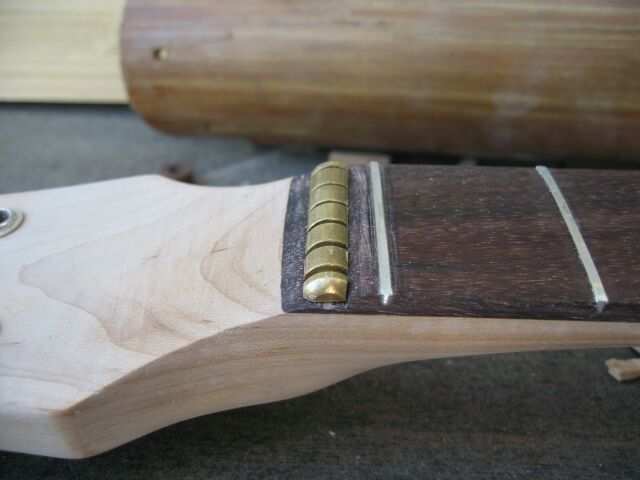
Here's the corner cut in the string nut. Looking at my '66 it seems the barrel is cut to where the notches are flush on the zero fret side, so that's what I did here, first with a dremel cutting wheel and then a hand file to smooth it out.
Image

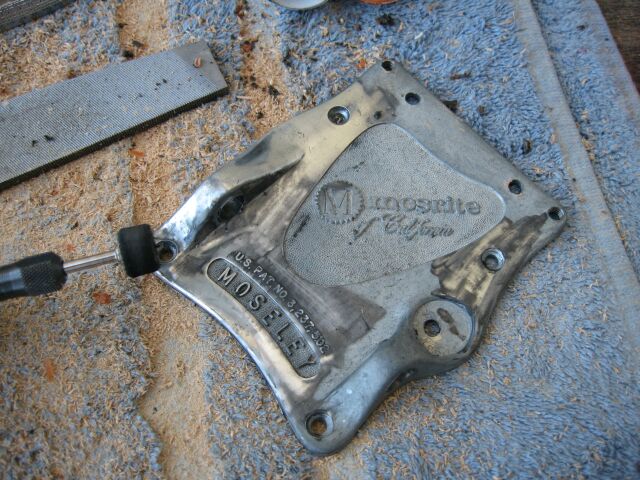
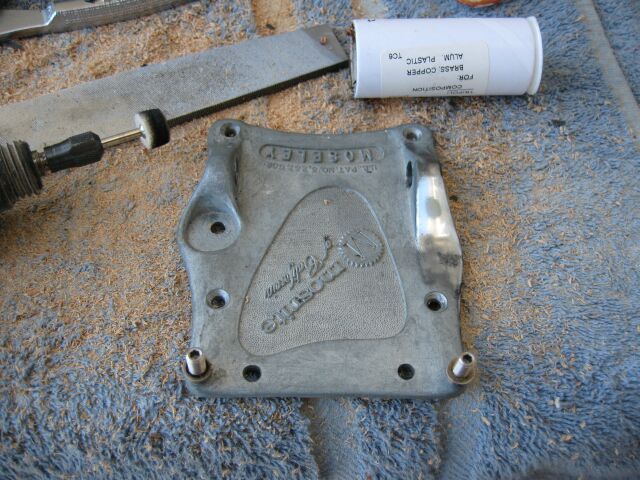
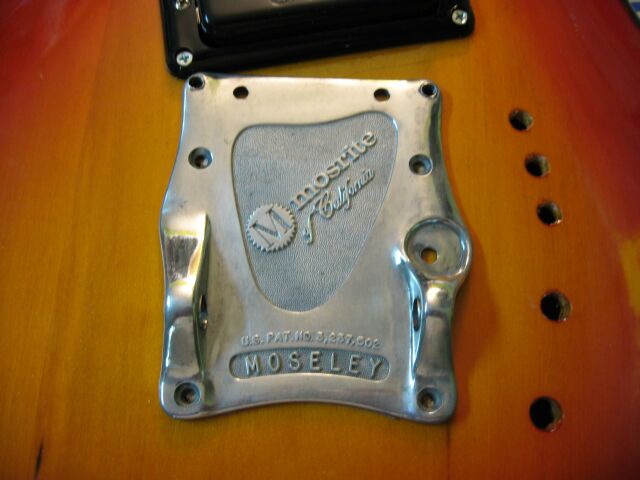
Next up, polishing the vibrato plate. As Danny suggested, the plate is aluminum and took pretty well to polishing. I tested it on the back, then moved to the front. I used my dremel buffing wheel and went through about a half dozen buffing pads in the process.
Image

Further along.
Image

After buffing I went over the plate with a soapy toothbrush and here are the results
Image

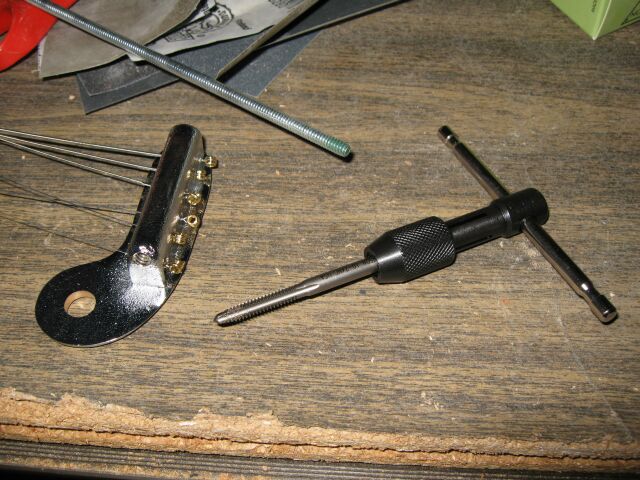
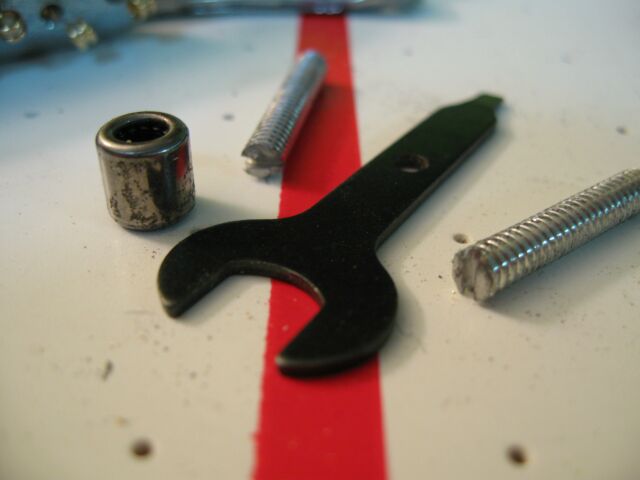
Next up is attaching the string guide to the vibrato plate. The bearings are Torrington B36. I decided that since I'd probably need to take it apart in the future, I'd use screws to hold the string guide. I got a thread reamer and cut the threads into the guide.
Image

After that I took some threaded rod, cut it to size and notched the ends - custom set screws!
Image

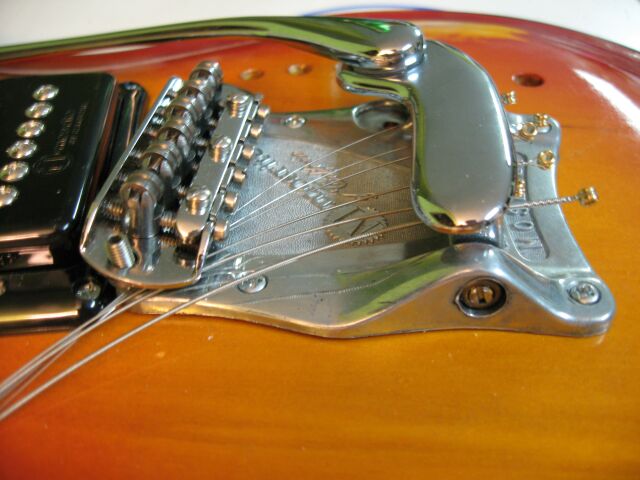
The final vibrato assembly.
Image

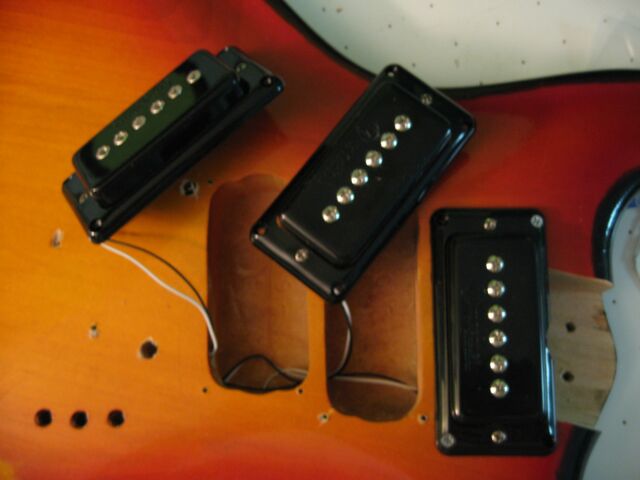
Here's the pickups showing the wire path to the rear controls.
Image

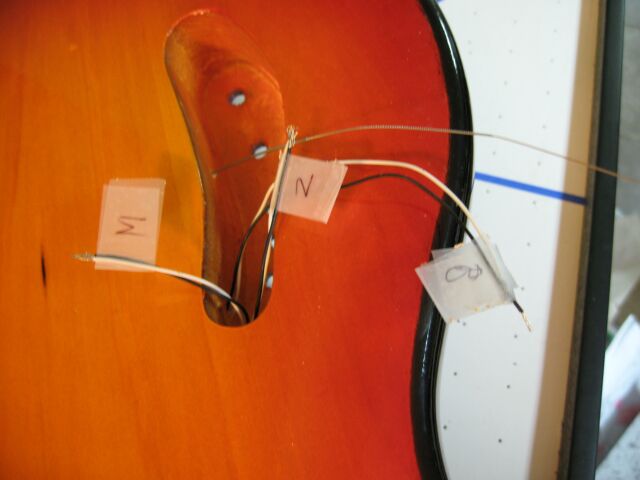
As I passed the pickup leads into the control cavity, I made sure to label them so I'd know which was which when I got to wiring. Here you can also see the bridge grounding wire. I used a wound guitar string, I think a D string.
Image

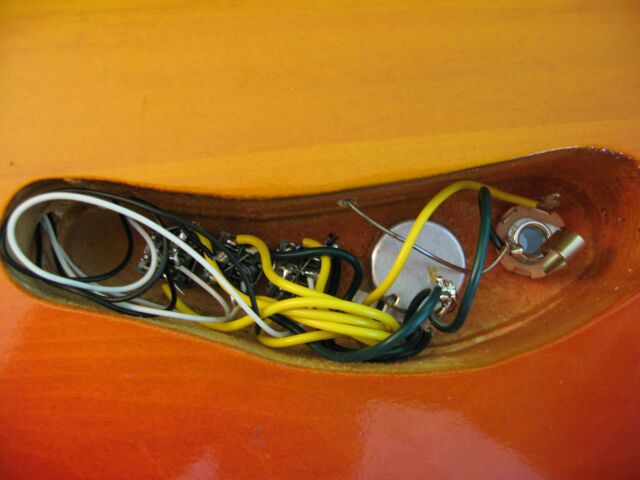
Sunday morning, I wired the guitar up. You can see the control cavity is cramped. Amazingly, when I plugged it in, there was only one shorted ground, which I was able to fix quickly.
Image

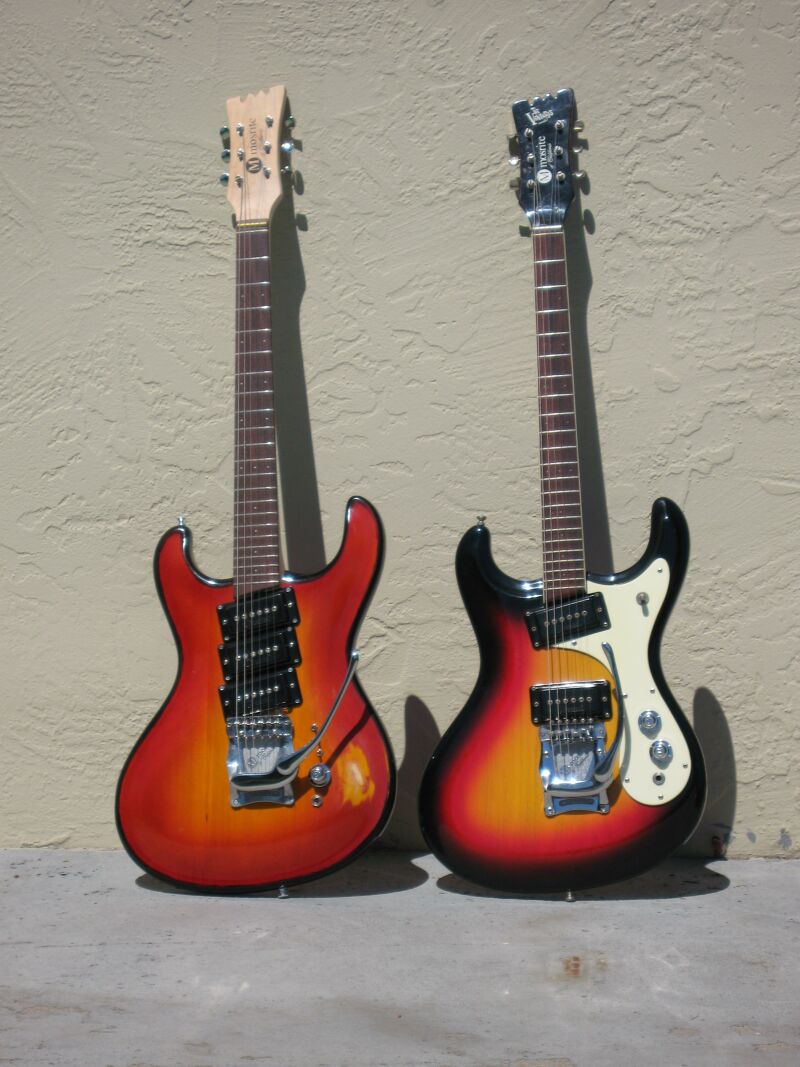
Here she is introduced to her older sister, the '66. The sound with the EFElliot pickups is fanastic - there is no question at all it's a Mosrite. Also, the switching allows you to select the phase of the pickups, so there's a wide range of tonal options. Overall, I'm pretty well stoked. It's amazing that someone with such basic woodworking skills as myself can get something like this together. I've still got some things left to do, mainly add side fret markers, cut a rear control cover and put some kind of finish on the neck, but, after all this, it's ALIVE!!!!
Image
Oy vey - it's MESHUGGA BEACH PARTY - The world's premier Jewish Surf Music Band!

Image

What? Couldn't tell the logo is a link? So click here, what's the hold up? http://www.meshuggabeachparty.com

User avatar
dubtrub
Administrator
Posts: 3795
Joined: Sun May 04, 2008 10:12 am
Contact:

Re: Semi - Mosrite?

Postby dubtrub » Mon Aug 11, 2008 2:36 pm

Mel, That look's fantastic. I know you must have a great feeling of pride at this point.

Regarding the neck finish. Hopefully you have a Lowes Home Improvement store nearby. They carry two products that is inexpensive and works great. Get an aerosol can of clear DEFT Lacquer Sanding Sealer and a can of Valspar Hi Gloss Lacquer.

Spray on a couple of coats of sealer and let it dry. It dries real fast and is sandable in about 10 minutes. Sand it smooth and re spray it. Continuing spraying coats and sanding them with 400 grit wet or dry emery paper 'wet'. Hold it up to the light and sight down it to located any flaws. Sand those flaws smooth and re apply more coats of sealer in those areas until it appears perfect. Then wet sand it again real smooth with 400.

Next, spray on a fog coat of clear. After it sets for a couple of minutes, spray on a heavier coat. Set it aside and let it dry for half an hour. Then spray on another fog coat followed by a heavier coat. What you want to do is build up layers of clear lacquer but not to the point of getting a 'run'. After about five coats of this process. set it aside for about a week to dry. Lacquer will surface dry, but will remain soft underneath for a couple of weeks.
Once you feel it is dry enough, wet sand it with 400, then 6 or 800. The next step is what brings it to life. Get some automotive 'white rubbing compound' at your local automotive store or paint store. Use a section of cotton T shirt dampened slightly with water and apply a very small amount of compound. Begin by a circular then back and forth motion, continuing until you bring a high gloss and luster to the finish. Once you've accomplished the degree of polishing that you feel is right, then use McGuire's swirl remover and polish it to it's final luster.

If you are going to apply logo decals, they should be applied before the clear glass lacquer coats are applied, ogtherwise you have to spray muiltiple coats of clear over them to seal them an make them look right.
Danny Ellison

User avatar
MWaldorf
Site Admin
Posts: 3264
Joined: Sat May 24, 2008 1:21 pm
Location: Alameda, California
Contact:

Re: Semi - Mosrite?

Postby MWaldorf » Mon Aug 11, 2008 3:31 pm

Danny,
Thanks for the advice. There's a Lowes somewhere near here. I assume that the sealer/laquer is for the maple part of the neck and not the fretboard, right? So, do I need to coat the vibrato plate with anything to keep it from tarnishing or will the bare aluminum be ok?
Mel
Oy vey - it's MESHUGGA BEACH PARTY - The world's premier Jewish Surf Music Band!

Image

What? Couldn't tell the logo is a link? So click here, what's the hold up? http://www.meshuggabeachparty.com


Return to “Mosrite & Clone, Projects, Parts & Accessories Q&A”

Who is online

Users browsing this forum: No registered users and 43 guests